Instructions on setting up your organization's Stripe account
Watch the How-To Video Below!
Business Type:
Non-Profit Onboarding (Board of Directors)
Individual Onboarding (No Board of Directors)
Non-Profit Onboarding
1. Login to the Rafflebox Dashboard at https://dashboard.rafflebox.ca
Click on your username on the top right and click on "Account"
2. Click on "Setup Stripe Connect"
3. Select "Non-Profit" for your type of business. Then select "Non-profit organization" as your business structure.

4. Enter your Organization Details such as organization name, and address and click Continue (Note - The name entered here should match what is on file with your bank)

5. Enter your personal information and select "I am a member of the governing board of this company". If you are the only one, select "Yes" and click Continue. If not, select "No" and click Continue.

6. To add additional board members, click "Add another director" and select Continue.

7. Enter in their info and select "Add".

8. Click Continue once you have all members added.

9. Add a phone number for your organization.

10. Review your information and click submit. If you notice any "Incomplete" error tags, click edit next to the error tag.

11. You may be asked to verify your identity by uploading a copy of photo ID.

12. When no "Incomplete" error tags are found, you can click "Agree and submit".
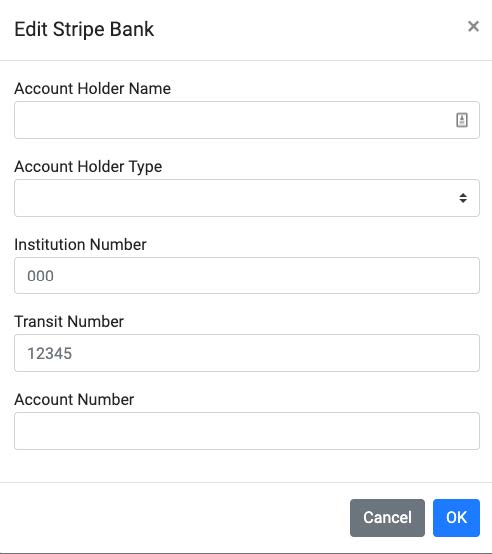
13. Click on “Edit Bank Account”
14. Enter your bank details and then hit OK.

Your merchant account is now setup and ready to use.
Individual Onboarding
1. Login to the Rafflebox Dashboard at https://dashboard.rafflebox.ca
Click on your username on the top right and click on "Account"
2. Click on "Setup Stripe Connect"
3. Select "Individual or sole proprietorship" for your type of business. Click continue

4. Enter your personal information and click continue.

5. Enter your organization's website info and description.

6. Review your information and click submit. If you notice any "Incomplete" error tags, click edit next to the error tag.

7. You may be asked to verify your identity by uploading a copy of photo ID.

9. When no "Incomplete" error tags are found, you can click "Agree and submit".
10. Click on “Edit Bank Account”
11. Enter your bank details and then hit OK.

Your merchant account is now setup and ready to use